Workplace Efficiency Booster is a six-step challenge to help you and your team identify and remove some of the inefficiencies in the workplace.
It will step you through a structured process, which can be completed at whatever speed works for you and your team. You will get the best results by systematically working through the process and completing the exercises in each step before you start on the next step.
Each step will give you and the team, activities and tips to help you improve your workplace efficiency. You will be challenged to find solutions that are minimal cost and have a positive impact on the team as well as the farm business.
We recommend you refer to the creating a productive workplace page to help you.
Workplace Efficiency Booster sign up
In the last 7 days, have you or any of your team had to:
- Wait for anything? e.g. information, cows, someone else, a breakdown, equipment
- Search for a tool or piece of equipment, information or a person?
- Redo a job because it wasn't done properly?
- Throw away something because of a defect? e.g. product, drugs, milk, broken tools or equipment.
If you answered yes to any of these questions, you and your team will benefit from taking the challenge.
Complete the challenge at your own pace by following the steps below, or sign up to receive weekly emails.
Workplace Efficiency Booster: 6 steps
Step 1 - Review the current situation
This is a team activity and you will get the best results from all getting involved. There are a few ground rules you must follow and these are listed below. Print this ground rules list out, add some of your own rules and put it on the wall where it can remind you as you work through the activities.
Ground rules
- Everyone needs to contribute.
- Everyone has something to offer.
- Be open to change.
- Don’t justify your position.
- Keep focused on the outcome.
- Listen.
- This is everyone’s responsibility.
- Together Everyone Achieves More.
- You need to invest time to save time.
We often don’t realise how much inefficiency we have in our day-to-day operations. Some things are obvious like out-of-date products and drugs, breakages, and lost tools. Other things are less obvious like waiting for information to do a job, or the second herd to arrive.
You might think these things aren’t big and don’t happen that often, however, you would be surprised how lots of little things add up and often there can be significant amounts of time and money lost out of the system every day.
Think about what difference it would make to your team if you could all save 30 minutes a day by changing a few things.
Initial assessment
Completing an assessment at the start of the process will give you a benchmark to measure your progress.
Download the Assessment, complete it and keep it as your benchmark.
You're now ready to move on to Step 2
Step 2 - Finding inefficiencies
Inefficiencies can be described as actions or activities that don't add value to the job you're doing.
Examples include waiting for broken equipment to be fixed before you can do a job, searching for the correct spanner to tighten a loose fitting, redoing a job that wasn’t done correctly the first time and throwing away a product because it is out of date or damaged.
This often leads to higher costs, frustration, and decreased productivity and can impact negatively on safety.
To eliminate, isolate or minimise inefficiency, it is helpful to work through a systematic process.
Process:
- Working as a team identify an activity to focus on e.g. milking.
- Use the Target table to identify as many inefficiencies as you can. Use the headings below to help you.
- Search (looking for information and material)
- Wait (process waiting)
- Redo (inefficient process and procedure)
- Defect (information and material)
- Note down what you think the cause is but don't spend too much time on this as we will cover this in Step 3.
- Work out what the benefits of fixing each of the inefficiencies will be.
- Once you have done this in one area, pick another area to focus on and follow the same process.
- Encourage the team to keep adding to the list during the week. Remember these are opportunities for improvement, so the more the better.
Potential traps!
- Don’t try to solve anything or justify why things happen the way they do. At this stage the idea is to capture as many problems as you can, we will turn these problems into opportunities through the challenge.
- Getting defensive about how things are done or trying to solve the problem immediately, can sidetrack you from the overall purpose of identifying inefficiencies in your business and finding low-cost, sustainable solutions to address the real reason these occur.
Once you have completed the above, you are now ready for Step 3
Step 3 - Identifying the cause
Week three of the challenge is to identify the true or real cause of the inefficiencies you found in step two.
This is a very important step and we often don’t take the time to investigate what the root of the issue is, jumping straight to the solution.
The trouble with this approach is that ‘quick fix’ solutions may not address the real cause, leading to the problem reoccurring or even getting worse.
Process for identifying the real cause
- Working as a team, describe the problem in more detail
e.g. a high number of cows coming up lame. Despite everyone being really careful to follow best practice when bringing the cows in, the problem seems to be getting worse, not better. - Gather evidence or data to help with decision-making
e.g. are the lame cows showing up with white line, stone bruising, sole penetration? How many cows with each type of lameness, what % of lame cows are coming from each herd? - Brainstorm the real cause by asking 'why' questions.
- Keep asking 'why' questions until you all agree that you have identified the real problem.
- Write down the real cause on your worksheet.
Potential Trap!
The real issue can be hidden behind perceived issues or symptoms. The risk is that we address the symptom and the real cause doesn’t get resolved. Stay focused on finding the real cause.
Eliminate or minimise?
Now decide if it is possible to eliminate or minimise.
Eliminate
E = Eliminate the inefficiency immediately – this is a good option for any problem that can be solved quickly through a low-cost solution.
Examples:
- Moving items you use all the time closer to where they are used.
- Writing up the jobs for the next day before you finish work, so staff don’t need to wait or go hunting for a manager to find out what to do.
- Getting a second scrubbing brush so more than one person can clean at once.
- Fix the yard wash or backing gate if it isn’t working properly.
Minimise
M = Minimise the inefficiency until you can resolve it later. This is a good option for problems that require a more technical solution, investigation into the best solution or some expenditure to resolve. It may be possible to apply a temporary low-cost solution.
Examples:
- Resurfacing the entry or exit into the dairy to improve cow flow.
- Anything that requires an infrastructure upgrade.
Once you have completed the above, you are now ready to move on to Step 4
Step 4 - Getting organised
Now it's time to start reducing the inefficiencies you have found and identifying cost-effective solutions.
You will find that a big chunk can be solved by setting up better systems and getting organised. Systems are covered in the next step, this step focuses on getting organised.
A cluttered workplace usually results in searching and waiting and contributes to an unsafe work environment.
Steps to getting organised
Visit the Workplace organisation page to help you work through the following:
- Get the whole team involved.
- Focus on one area at a time.
- Take before and after photos.
- Decide who will make the hard decisions.
- Do you use it frequently? Yes = put it in the work area.
- Do you use it occasionally? Yes = put it in the holding area.
- If you don’t use it occasionally can you return, sell or recycle it?
- If not then it’s rubbish so REMOVE IT.
- Set up a system for managing rubbish effectively, recycle if you can.
- If you use it regularly then locate the item at the point of use.
- Giving items a permanent home near where you use them will stop people having to go ‘hunting for them’.
- Label the location or use a picture to show what it should look like.
- Agree how you will maintain this new organised workplace.
Potential Traps!
- Keeping things you really don’t need because you ‘might need it one day’…chances are if you haven’t used it in a couple of years then you won’t use it at all.
- Storage of things that aren’t used often in places that mean it gets in the way.
- Not agreeing on a permanent home and labelling it – things will get put down or put away in different places.
Once you have completed the above, Step 5 is next...
Step 5 - Setting up systems
As we’ve learnt, inefficiency comes in many forms. Having good systems in place will:
- Standardise the process and remove the inefficiencies that happen when tasks are done in different ways.
- Lock in the changes, making them permanent work habits.
- Set the standard and provide a way to support a consistent way of doing things.
- Upskill employees, minimising risks and improving health and safety.
- Hold people accountable for doing the job correctly.
The best systems use simple, clear language; are very visual, are located where the job is done and can be fine-tuned as required.
Visit our Standard operating procedures page to help you work through this step.
Your challenge is to come up with the right systems, which have the right amount of detail to be useful and relevant.
Steps to setting up systems
- Involve the team
- They are usually the ones doing the job every day so will have ideas on how to do it more efficiently.
- If your team is involved in developing the system, they will ‘own’ it and are more likely to follow it.
- Identify the areas that need systems, these might be areas that;
- Have a big impact on the business if not done properly – e.g. vat wash.
- Have to be done a certain way because of Health and Safety.
- You have identified as having a lot of inefficiencies associated with them.
- Identify the steps in the process
- Keep these to task level and as simple as possible.
- Detail the steps
- If possible take photos of each step done correctly.
- Write notes to clarify each step as simply as possible.
- Test the system to make sure it works
- Test with an experienced person.
- Test with the newest person on the team.
- Put the system at the point of use
- Review the system after a week or so to make sure it makes sense
Potential Traps!
- Including too much detail and too many words in your system description.
- Not including the team when setting up the system, the team needs to ‘own’ the system.
Once you have completed the above, you can now move on to Step 6
Step 6 - Maintaining improvements
The biggest challenge is turning a focus on workplace efficiency into something the team does every day, so it just becomes part of the way you do things.
As a team come up with some ways you can maintain this new efficient way of working. Some examples are:
- Complete the Workplace Efficiency Booster exercise monthly to identify new opportunities for improvement.
- Make this a permanent agenda item at your weekly staff meetings.
- Review your systems regularly and schedule a process to do so.
- What are some others your team can think of?
Congratulations!
You've successfully navigated your way through the six weeks of the Workplace Efficiency Booster and we're sure you'll be pleased with the positive changes.
Why not pick a new activity to focus on and start again from Step 2? You'll be amazed at how many opportunities for improvement you can find all across your business.
Before and after examples of the Workplace Efficiency Booster
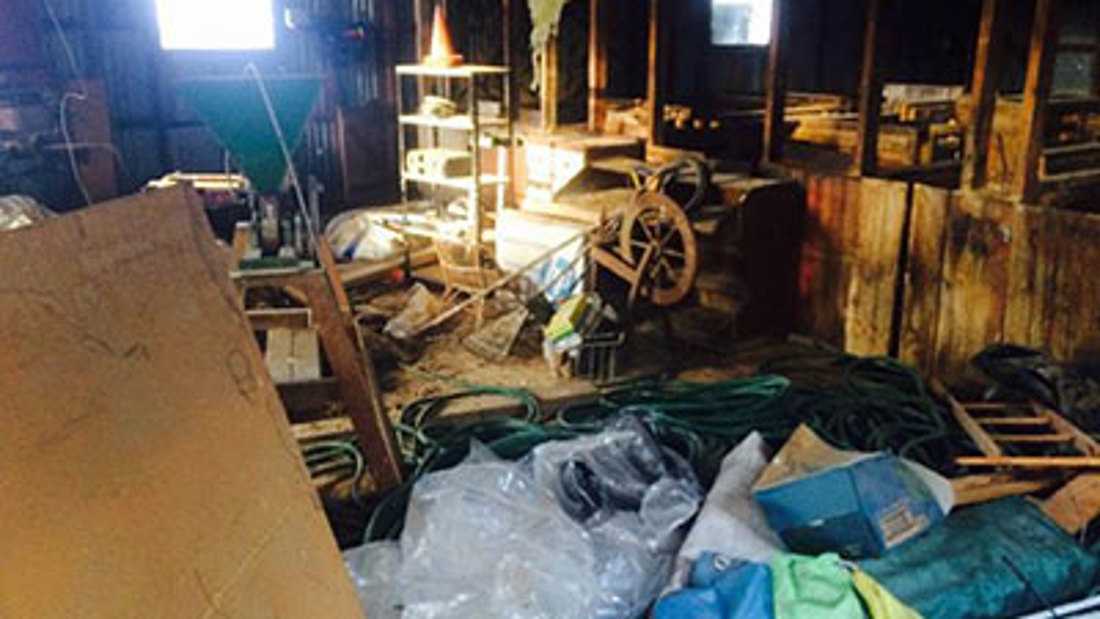
Example 1: Before
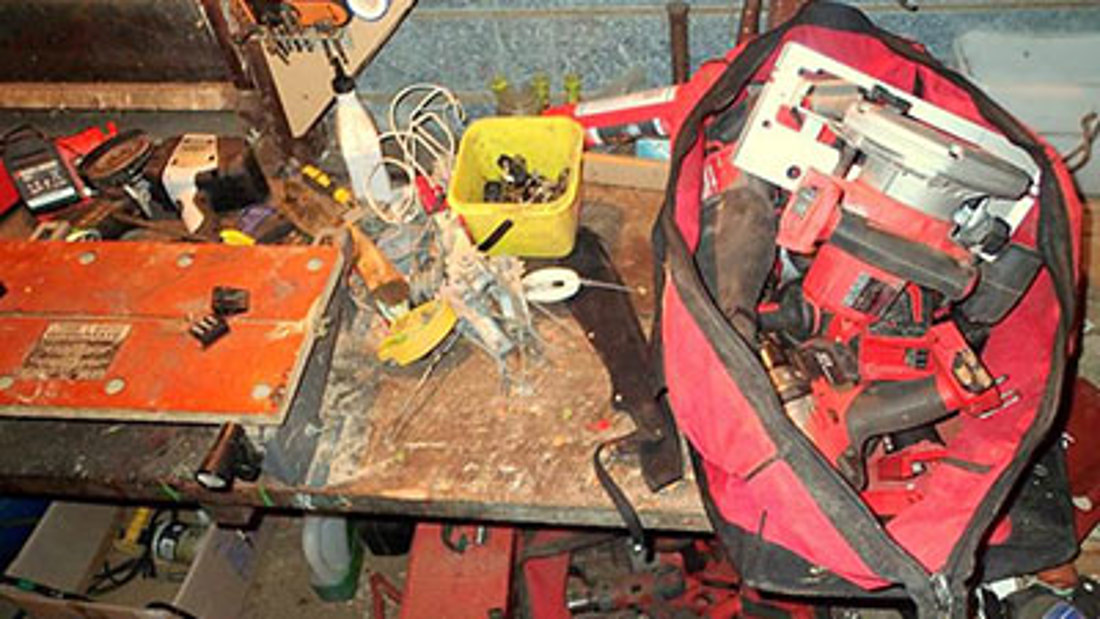
Example 2: Before
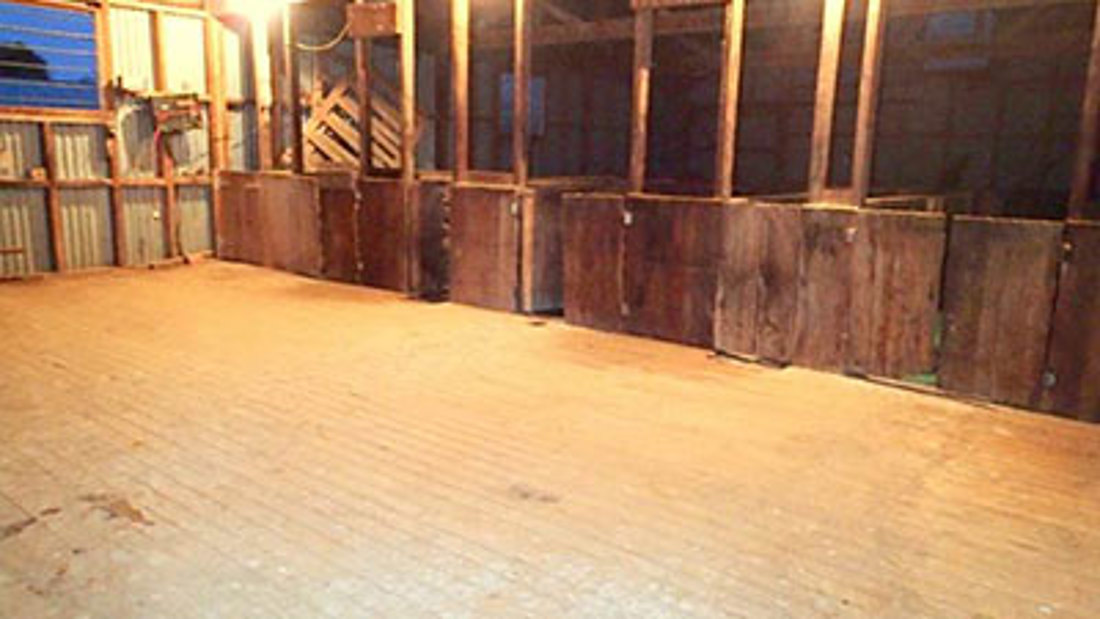
Example 1: After
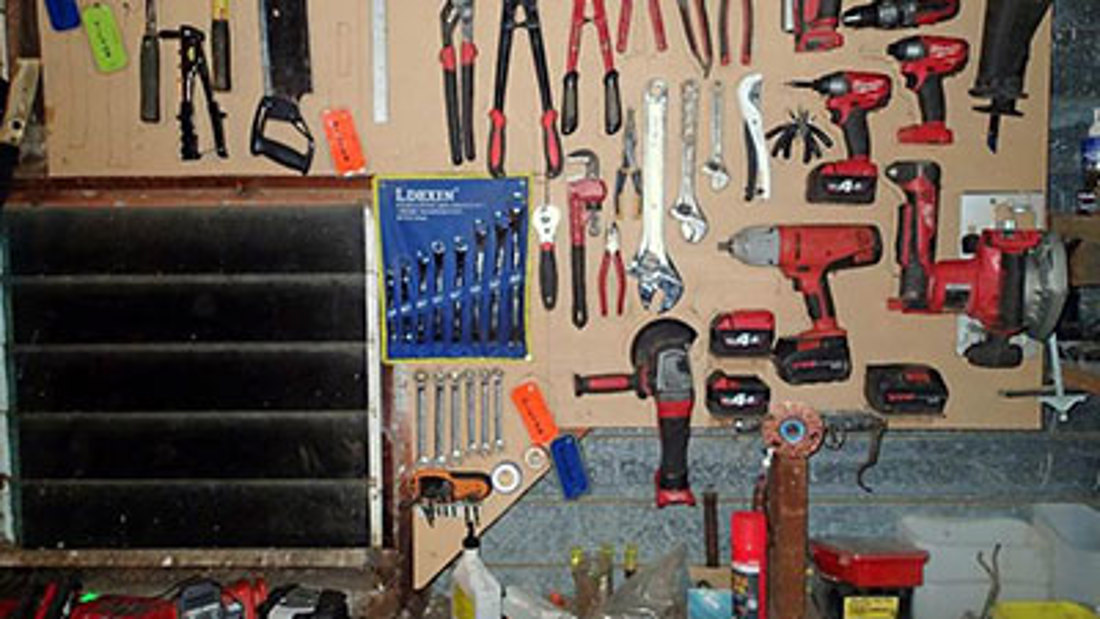
Example 2: After
Workplace Efficiency Booster resources
Workplace Efficiency Booster - Ground Rules
Workplace Efficiency Booster - Step 1: Initial assessment
Workplace Efficiency Booster - Step 2: Target table
Workplace Efficiency Booster - Step 3: Identifying the cause
FarmTune®
If you want to take your on-farm productivity journey further, take a look at FarmTune®. It is a training programme developed by DairyNZ and delivered by trained consultants to enhance dairy farm management using the principles of LEAN.
