Workplace organisation
Topics
4 min read
Creating an environment which is safe and efficient by removing clutter, rubbish, faulty items and unnecessary equipment from your farm can significantly enhance workplace morale, and productivity. Make decisions on which items to remove. Keep important items in designated places for easy use. Promote regular tidy ups. This encourages your team to take responsibility for maintaining standards and fosters a culture of collective responsibility and continuous improvement.
This involves identifying what needs to be sorted, making the decisions on what to do with it and putting it in the right place so they’re where you need them, when you need them. Focus on removing unnecessary clutter from the workplace. This may include:
Use the decision tree below to help with sorting:
The ‘red tag area’ is where items that are not needed for the job at hand are placed for further review. The easy part is dealing with items you know you need or want. The things we don’t know what to do with is what slows us down.
Assign responsibility for reviewing the red tag area frequently and use this visual to help make decisions. We recommend reviewing monthly or this could become another dumping ground on the farm.
If we don’t know what to do with something we generally put it out of the way for later, which means it gets forgotten. By making your red tag area somewhere visible, it reminds the team that these items need to be reviewed.
A red tag area also gives your team somewhere to put items that they don’t want in their work area but aren’t authorized to make decisions about.

Examples of red tag areas we’ve seen work well include:
Now the workplace is uncluttered, it’s time to organise the area so items are easy to find, use and return.
To do this, use visual ways to organise and label the layout of the workplace and the tools and equipment within it. Define storage areas, and provide visual guidelines on what materials are required, in what quantities, and in which locations. Organising is not just about tidying; it is also about eliminating waste. You can learn more about this in our Workplace Efficiency Booster.
Finding the best place to keep things, means that highly used items should be placed as close to the point that the job occurs as practical. E.g. have a hoof trimming tool kit at the crush. They should also be easy to reach and access.
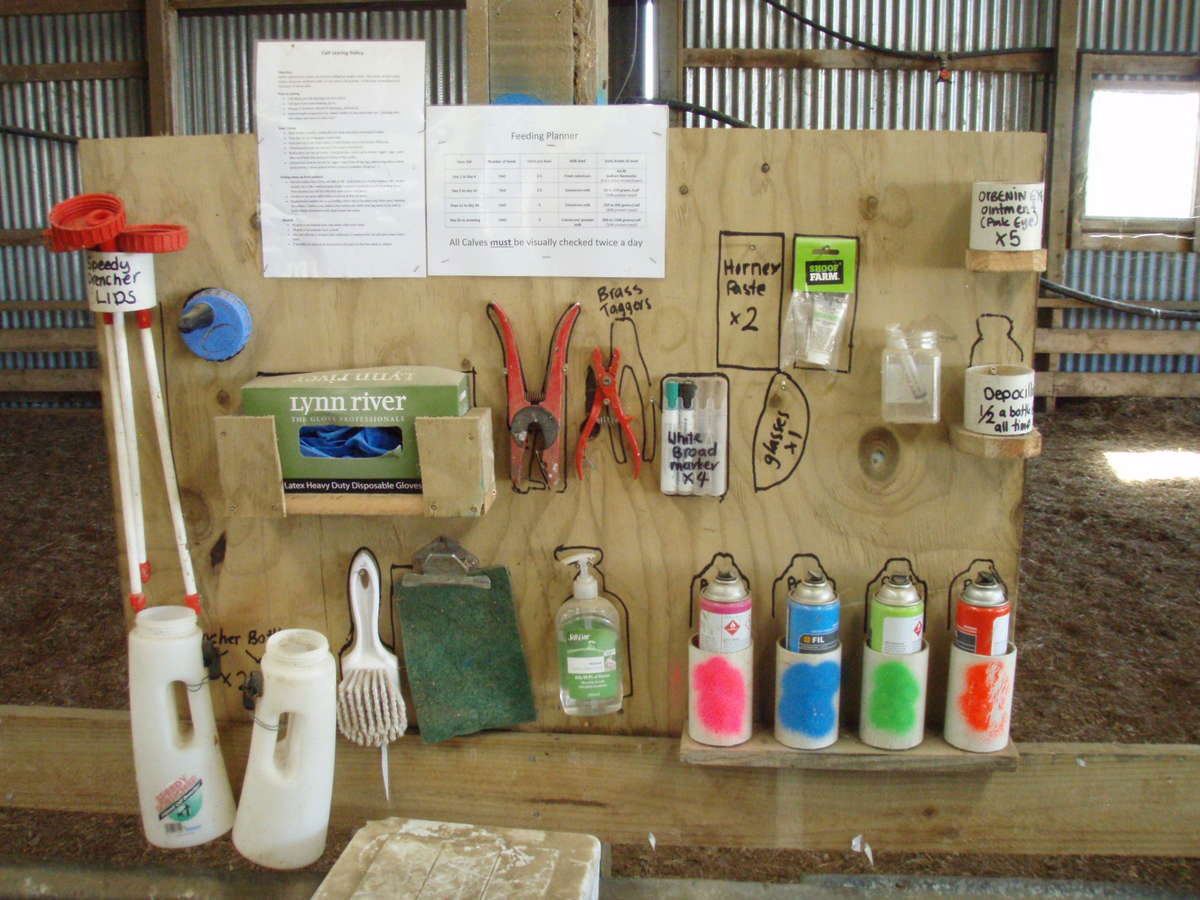
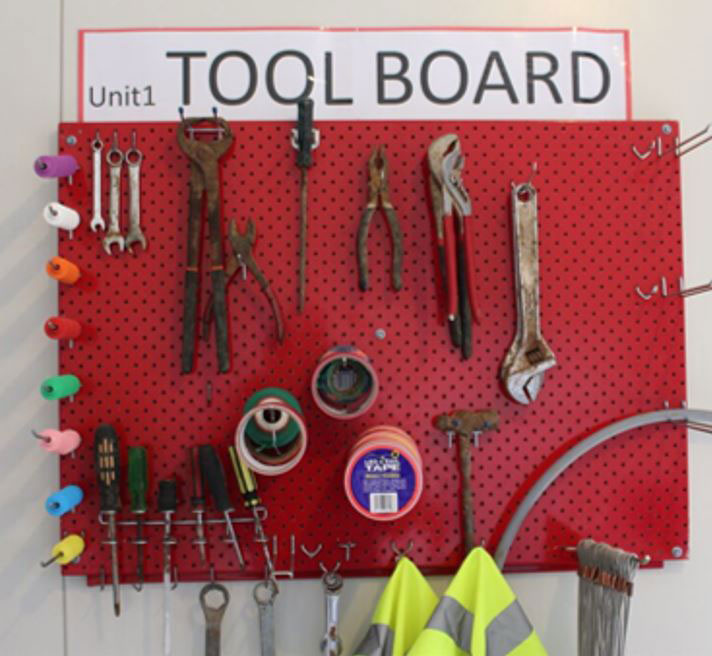
Vertical storage
Tools are stored on the wall at eye height, rather than on a shelf or in a cupboard. This keeps items visible. The team can spot what they need without you needing to describe where it is. Storing items vertically helps ensure they can be retrieved quickly. The aim is to be able to retrieve any commonly used tool or information within 60 seconds! On the flip side, people know where tools live and can return them. No need to clean up after people and return things to their home.
Vertical storage can be achieved with shadow boards, hooks, magnets.
Ergonomic storage
This involves storing equipment that is heavy or awkward to move horizontally, to reduce the need to bend, lift, stretch and twist. Make these items easy to access by planning and designing the storage area for easy handling.
For example:
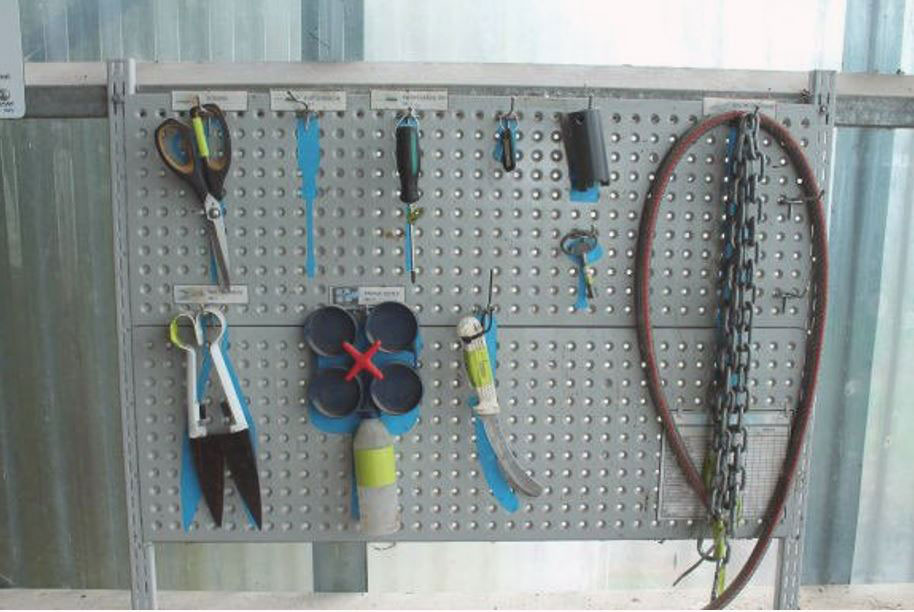
Visual controls
When the permanent location for an item is found, there needs to be visual controls in place to ensure that the item is returned to the place of storage and is obvious when missing or in use.
Visual controls could include, shadow boards, signage, painting, maps and diagrams, colour coding, outlining and pictures.


Now’s the perfect time to check in, plan, and set up for a strong season. We’ve pulled together smart tips and tools to help you stay ahead all winter long.
Whether you prefer to read, listen, or download handy guides, we’ve got you covered with trusted tools to support your journey every step of the way.
Put our proven strategies and seasonal tools to work. Boost production, support animal health and watch your profits hum.
Tools that are backed by science, shaped by farmers and made for this season.
That’s Summer Smarts.
Autumn Smarts brings together the research-backed tools that build resilience and boost performance.


